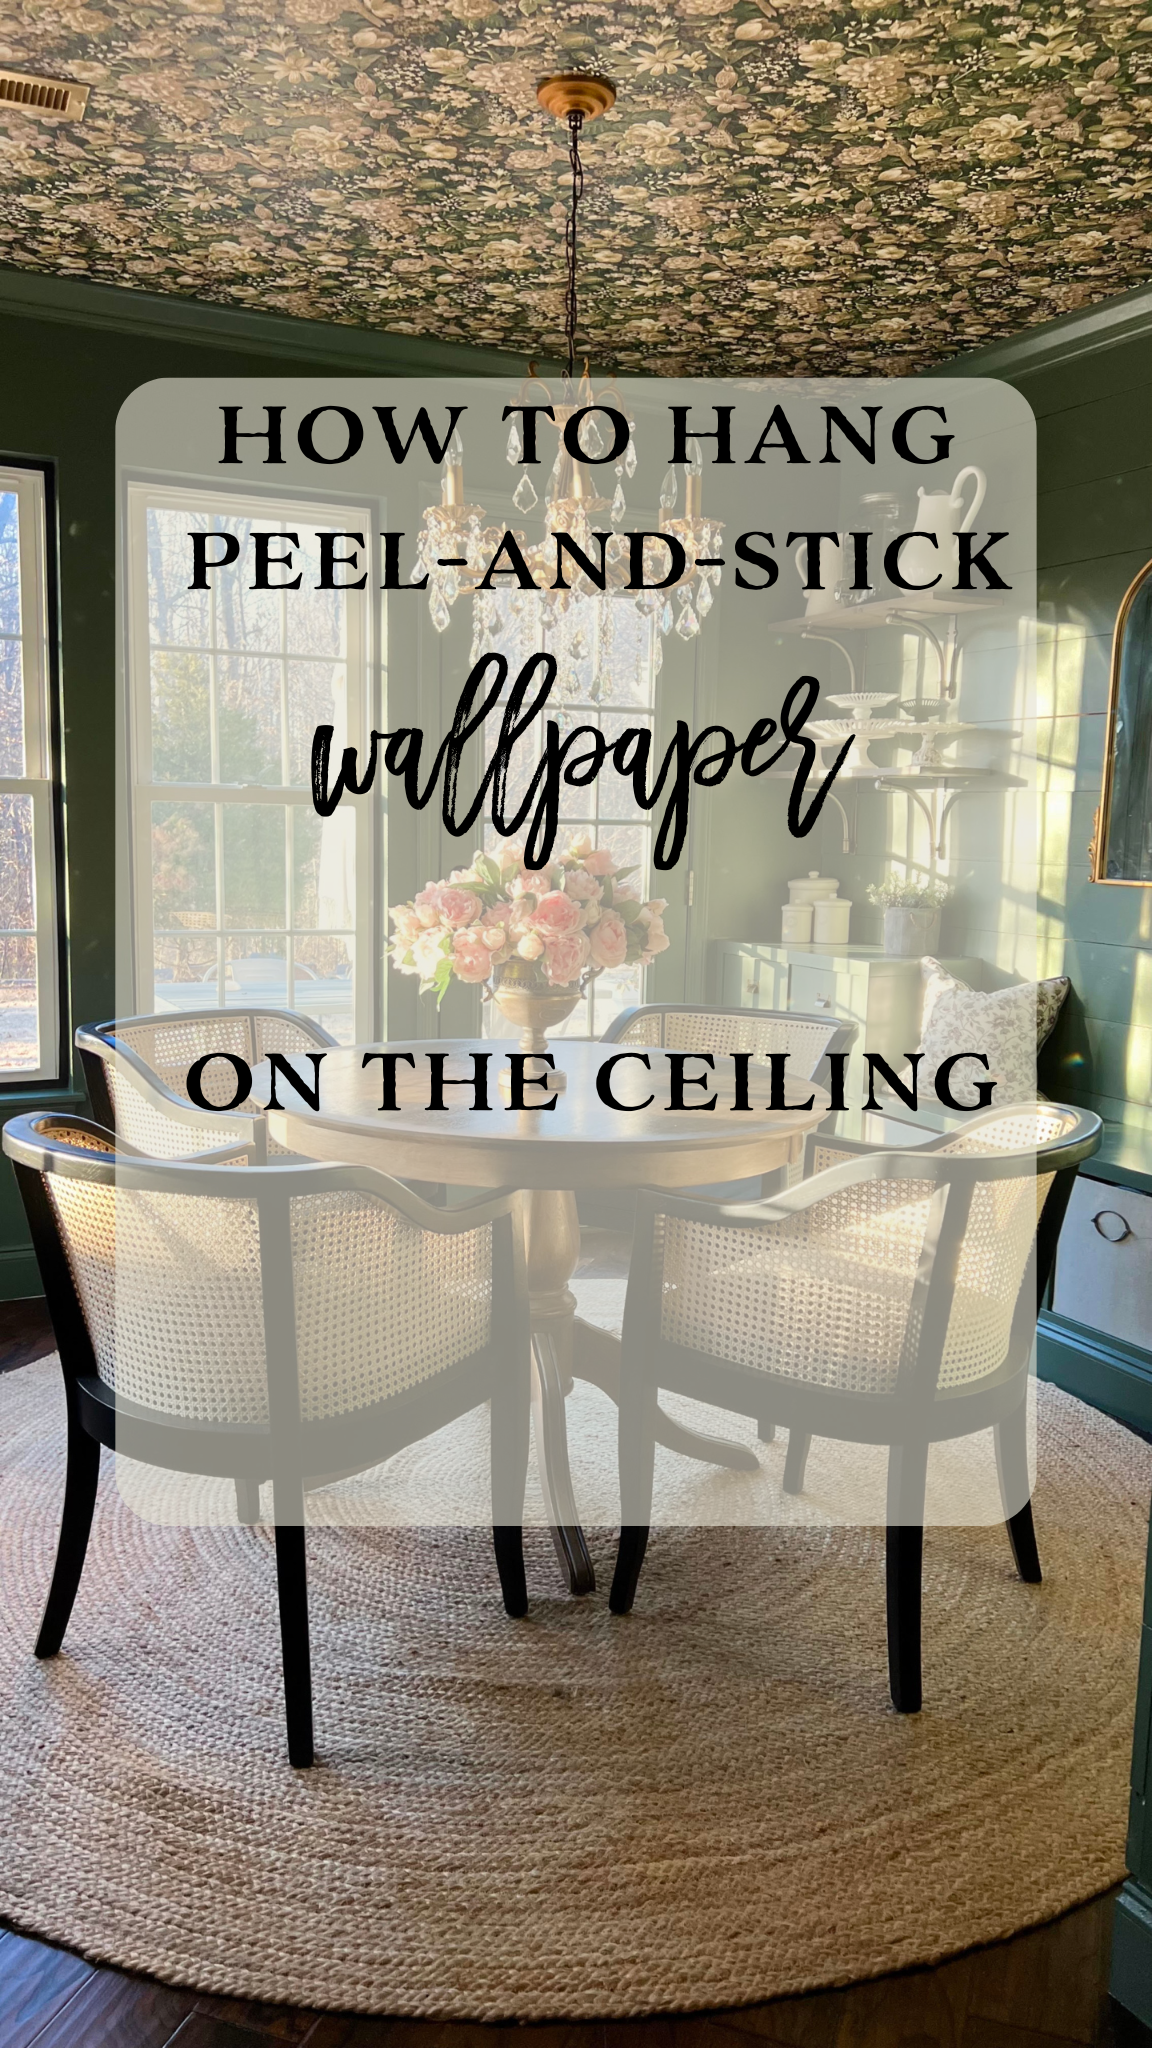
Adding peel-and-stick wallpaper to your ceiling is an easy way to create a stunning design feature with minimal mess. Whether you’re going for a bold accent, a subtle texture, or a classic pattern, installing wallpaper overhead requires the right tools, techniques, and patience. In this guide, I’ll walk you through the best method for hanging peel-and-stick wallpaper on the ceiling, including a pro tip for ensuring straight alignment from the start!
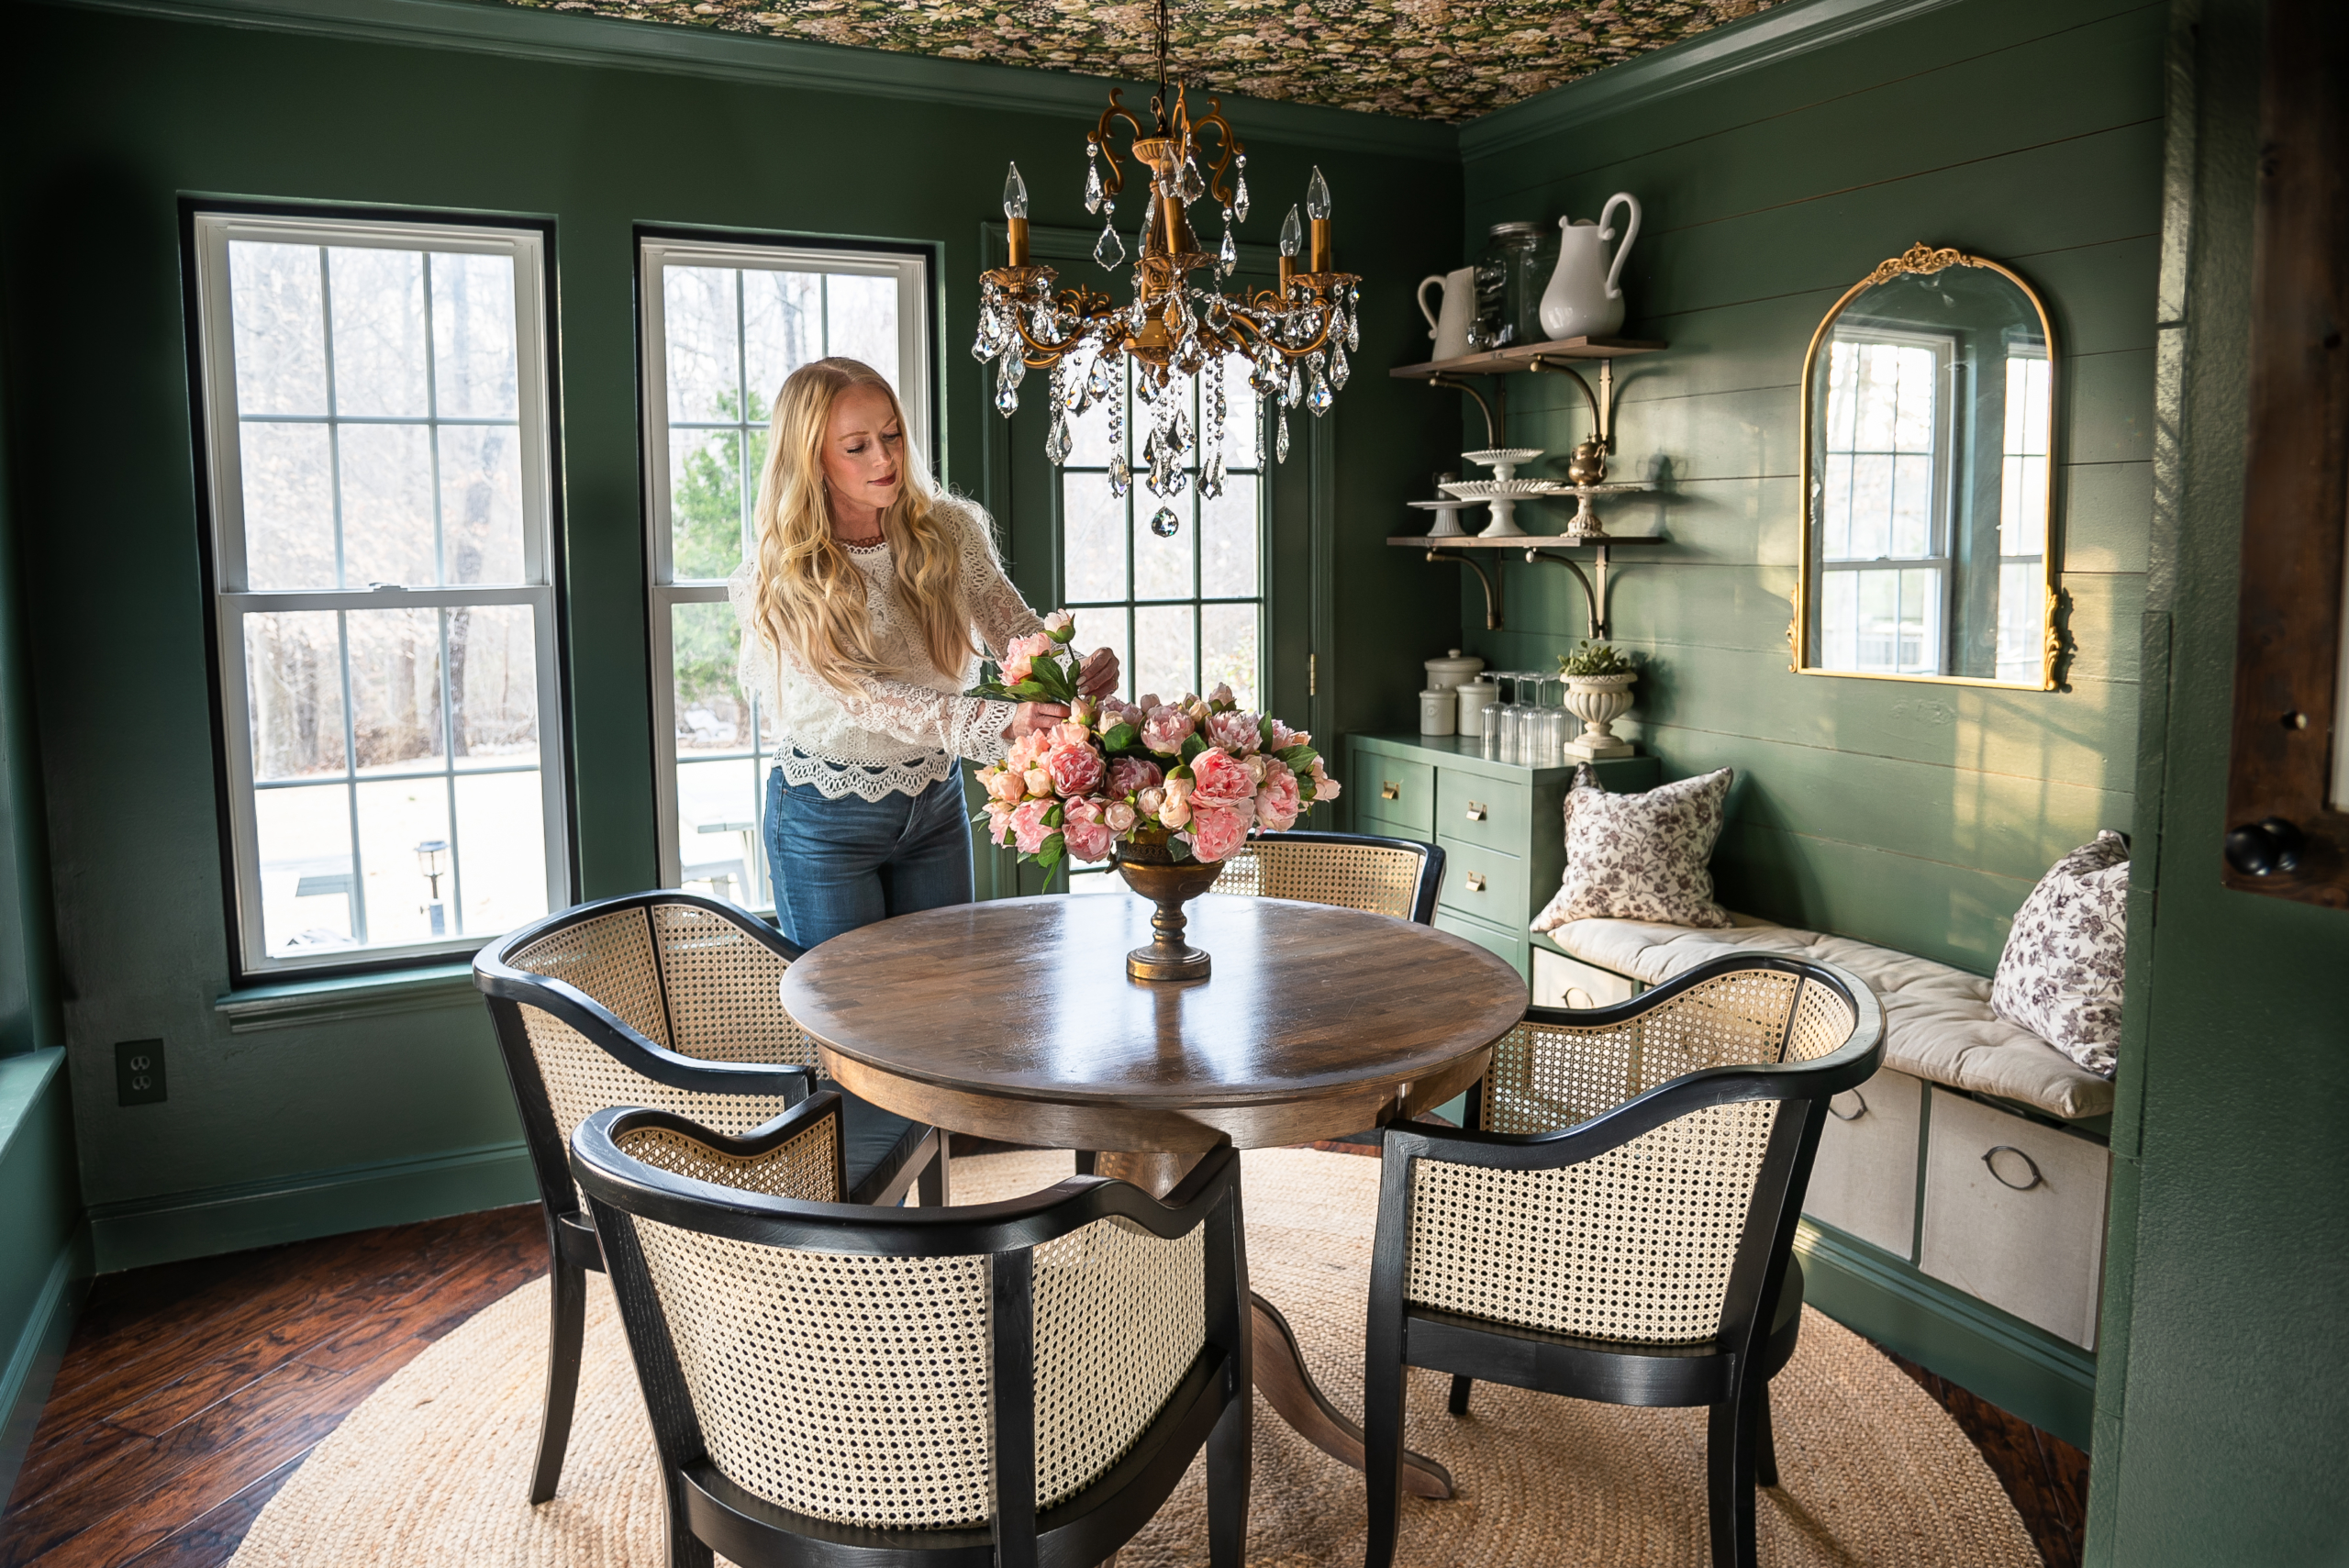
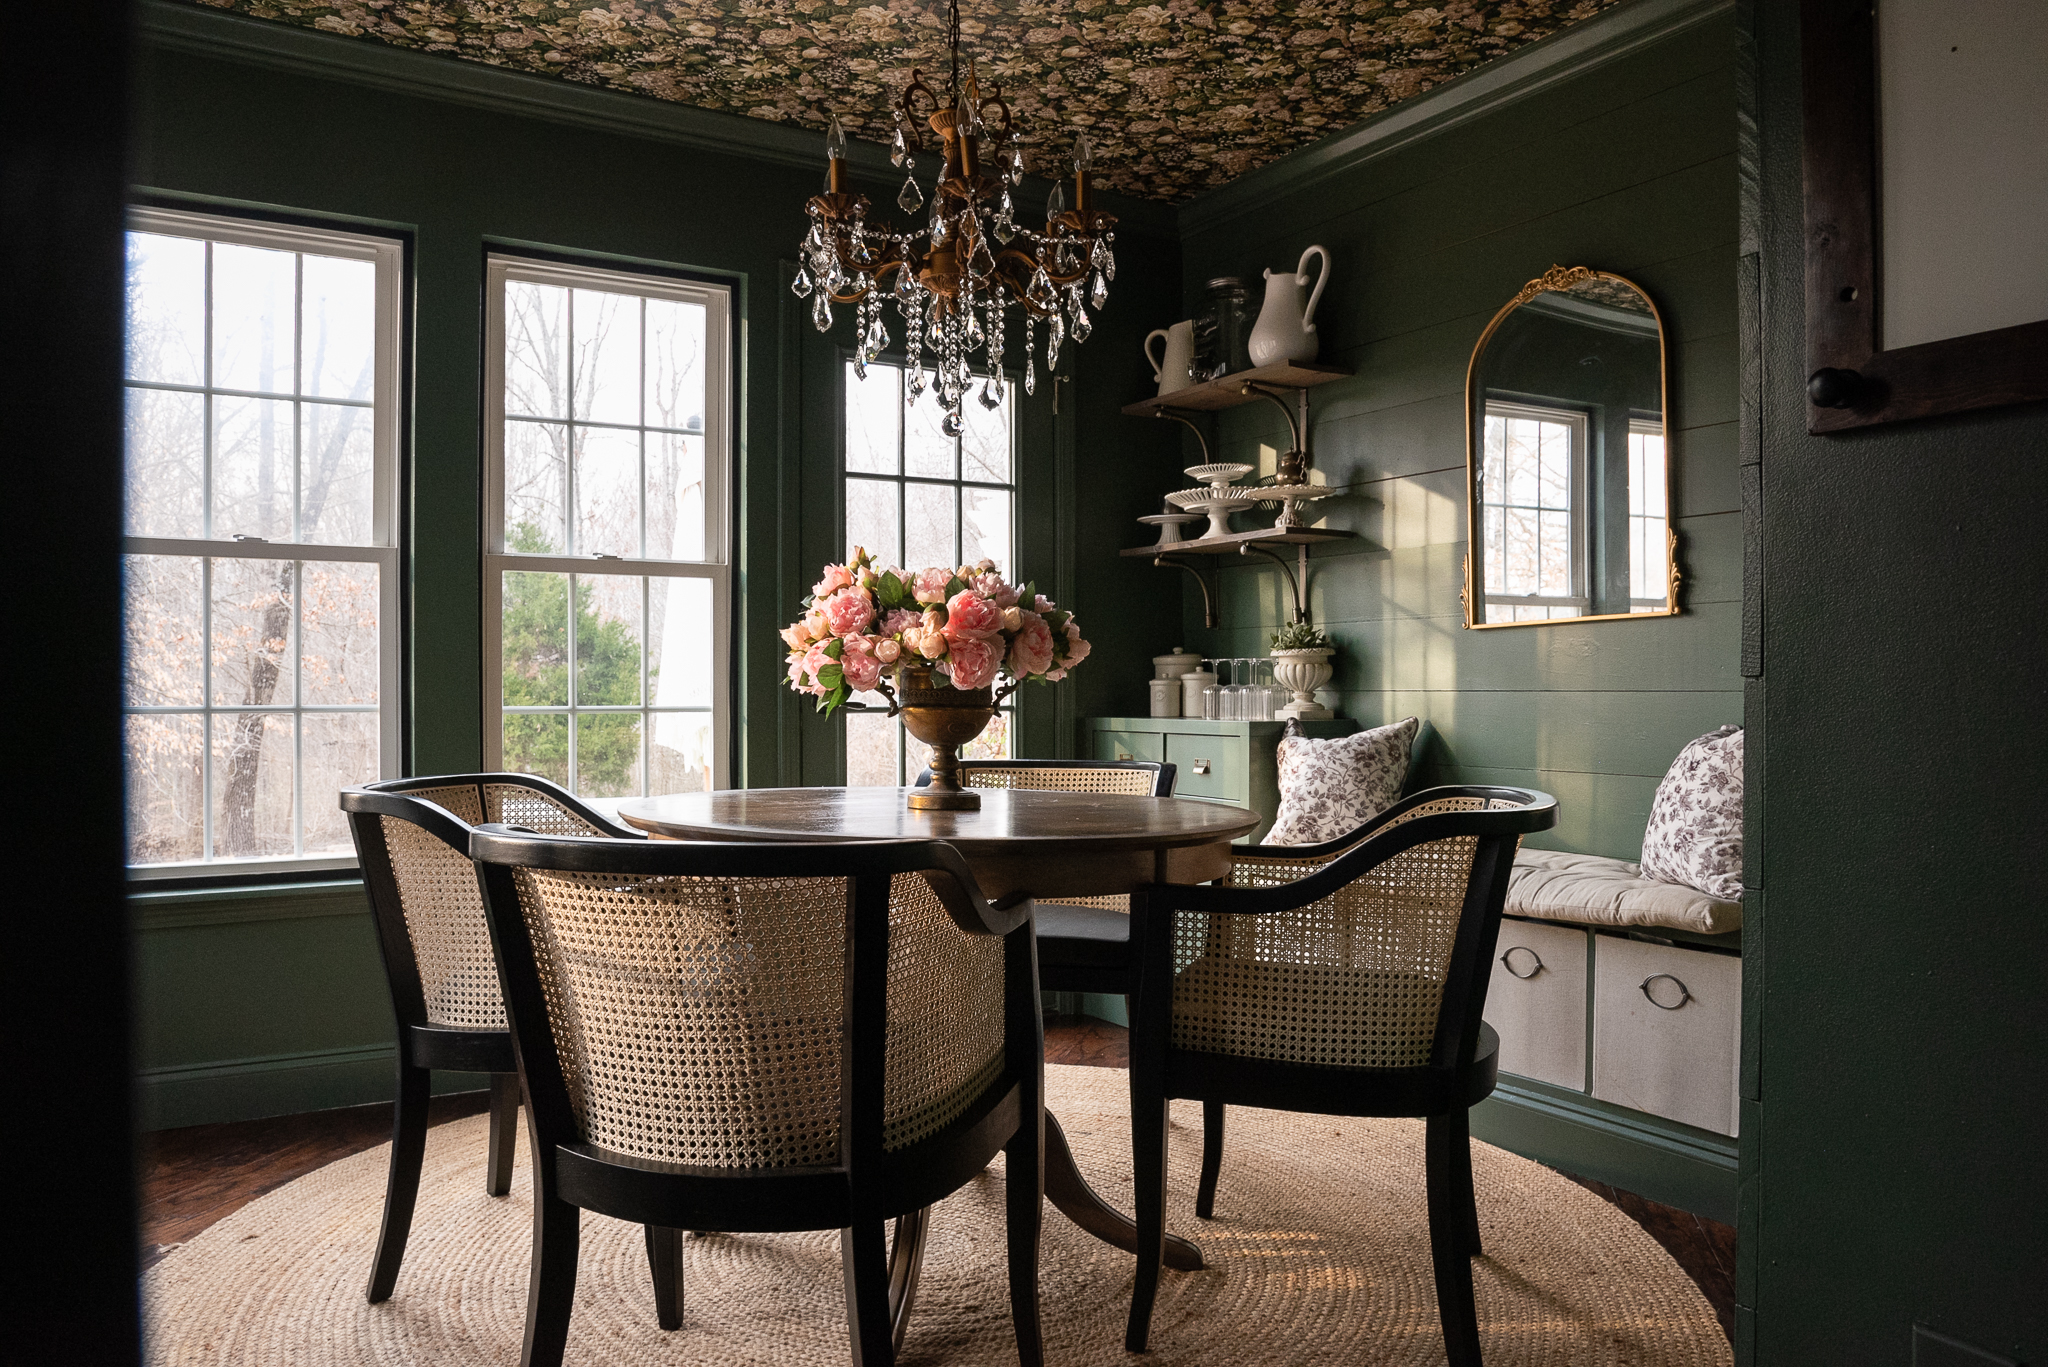
Room Sources: Chairs | Rug | Chandelier | Faux Peonies | Wallpaper
I recently gave my breakfast room a dramatic makeover, which you can read all about in this post: How to Make a Room Dramatic and Moody with Dark Green Paint. Be sure to check it out to see the full before-and-after transformation and get inspired with rich green paint color ideas and recommendations. One of the most striking updates in the space is the patterned wallpaper on the ceiling. Often called the “fifth wall” in interior design, the ceiling is an overlooked opportunity to add visual interest and depth to a room. Today, we’re going to dive into exactly how to hang peel-and-stick wallpaper on the ceiling for a polished, professional finish. Even if you’ve never done it before, I hope this post gives you the courage to try something new in your space!
What’s the Difference Between Contact Paper and Peel-and-Stick Wallpaper?
Choosing a good quality paper that is easy to work with will pay off in the end! Be sure you’re selecting a peel-and-stick wallpaper and not a contact paper. Although often used interchangeably, contact paper and peel-and-stick wallpaper are not the same and the difference matters, especially for ceiling applications.
Contact paper is typically thinner, more plasticky, and designed for lining drawers, shelves, and flat surfaces. It’s not made for long-term wall or ceiling use and can be difficult to work with due to its tendency to stretch, bubble, and tear.
Peel-and-stick wallpaper, on the other hand, is specifically designed for vertical surfaces and decorative use. It’s usually made of a thicker vinyl or fabric-like material that’s easier to reposition, align, and smooth. It also tends to have stronger adhesive, making it more suitable for ceilings and walls.
Quick Tip: Many Amazon sellers label contact paper as “peel-and-stick wallpaper,” which can be misleading. Always check the reviews, material description, and thickness. Look for products that specifically mention wall or ceiling application and avoid anything that’s labeled for drawer liners or shelf use only.
Supplies Needed for Wallpapering a Ceiling
Before you begin hanging your wallpaper, first gather all supplies needed:
-
Peel-and-stick wallpaper to cover the square footage of your ceiling (use this wallpaper calculator to determine amount of rolls needed)
-
Chalk line (for creating a straight starting point)
- Scissors
-
Step ladders (2) (to straddle between for better control)
-
Utility knife & extra blades (for precise cuts)
-
Smoothing tool or wallpaper squeegee (I like this one)
- Seam roller
-
Painter’s tape (optional, but helpful for extra positioning help)
-
A second set of hands (Highly recommend, but I did this ceiling by myself so you can too!)
Step 1: Prep Your Ceiling
For the wallpaper to adhere properly, your ceiling must be clean, dry, and smooth.
-
Wipe down the surface with a damp cloth and mild soap to remove dust and oils.
-
Let it dry completely before starting.
-
If your ceiling has a little texture, lightly sand the surface or apply a primer designed for wallpaper adhesion. This step helps ensure the wallpaper sticks more securely and lasts longer.
- If your ceiling is heavily textured, this may not be the project for you! You could try installing wallpaper liner to create a smooth surface.
Quick Tip: Test the Wallpaper’s Adhesion in a Small Section Before Committing
If you’re uncertain about how the peel-and-stick wallpaper will react with your ceiling, start with a small test area. This will help you see how easily the wallpaper peels off or adheres, especially if you’re concerned about leaving residue behind later. Warning: Some peel and stick wallpaper WILL peel off your drywall even if advertised as removable.
Step 2: Mark a Straight Starting Chalk Line
This step was crucial for ensuring that my wallpaper didn’t drift off course as I worked across the ceiling.
-
Use a chalk line to snap a straight guide across the ceiling.
-
Measure and mark where your first wallpaper strip should go.
-
Use a pushpin to secure one end of your chalk line or have a helper hold one end while you snap the chalk line across the length of the ceiling.
-
This line will serve as your guide for the first strip. If the first one is straight, the rest should follow!
Quick Tip: If you don’t have a chalk line, use a spirit level to double-check that your first strip is aligned perfectly straight before you start applying more wallpaper.
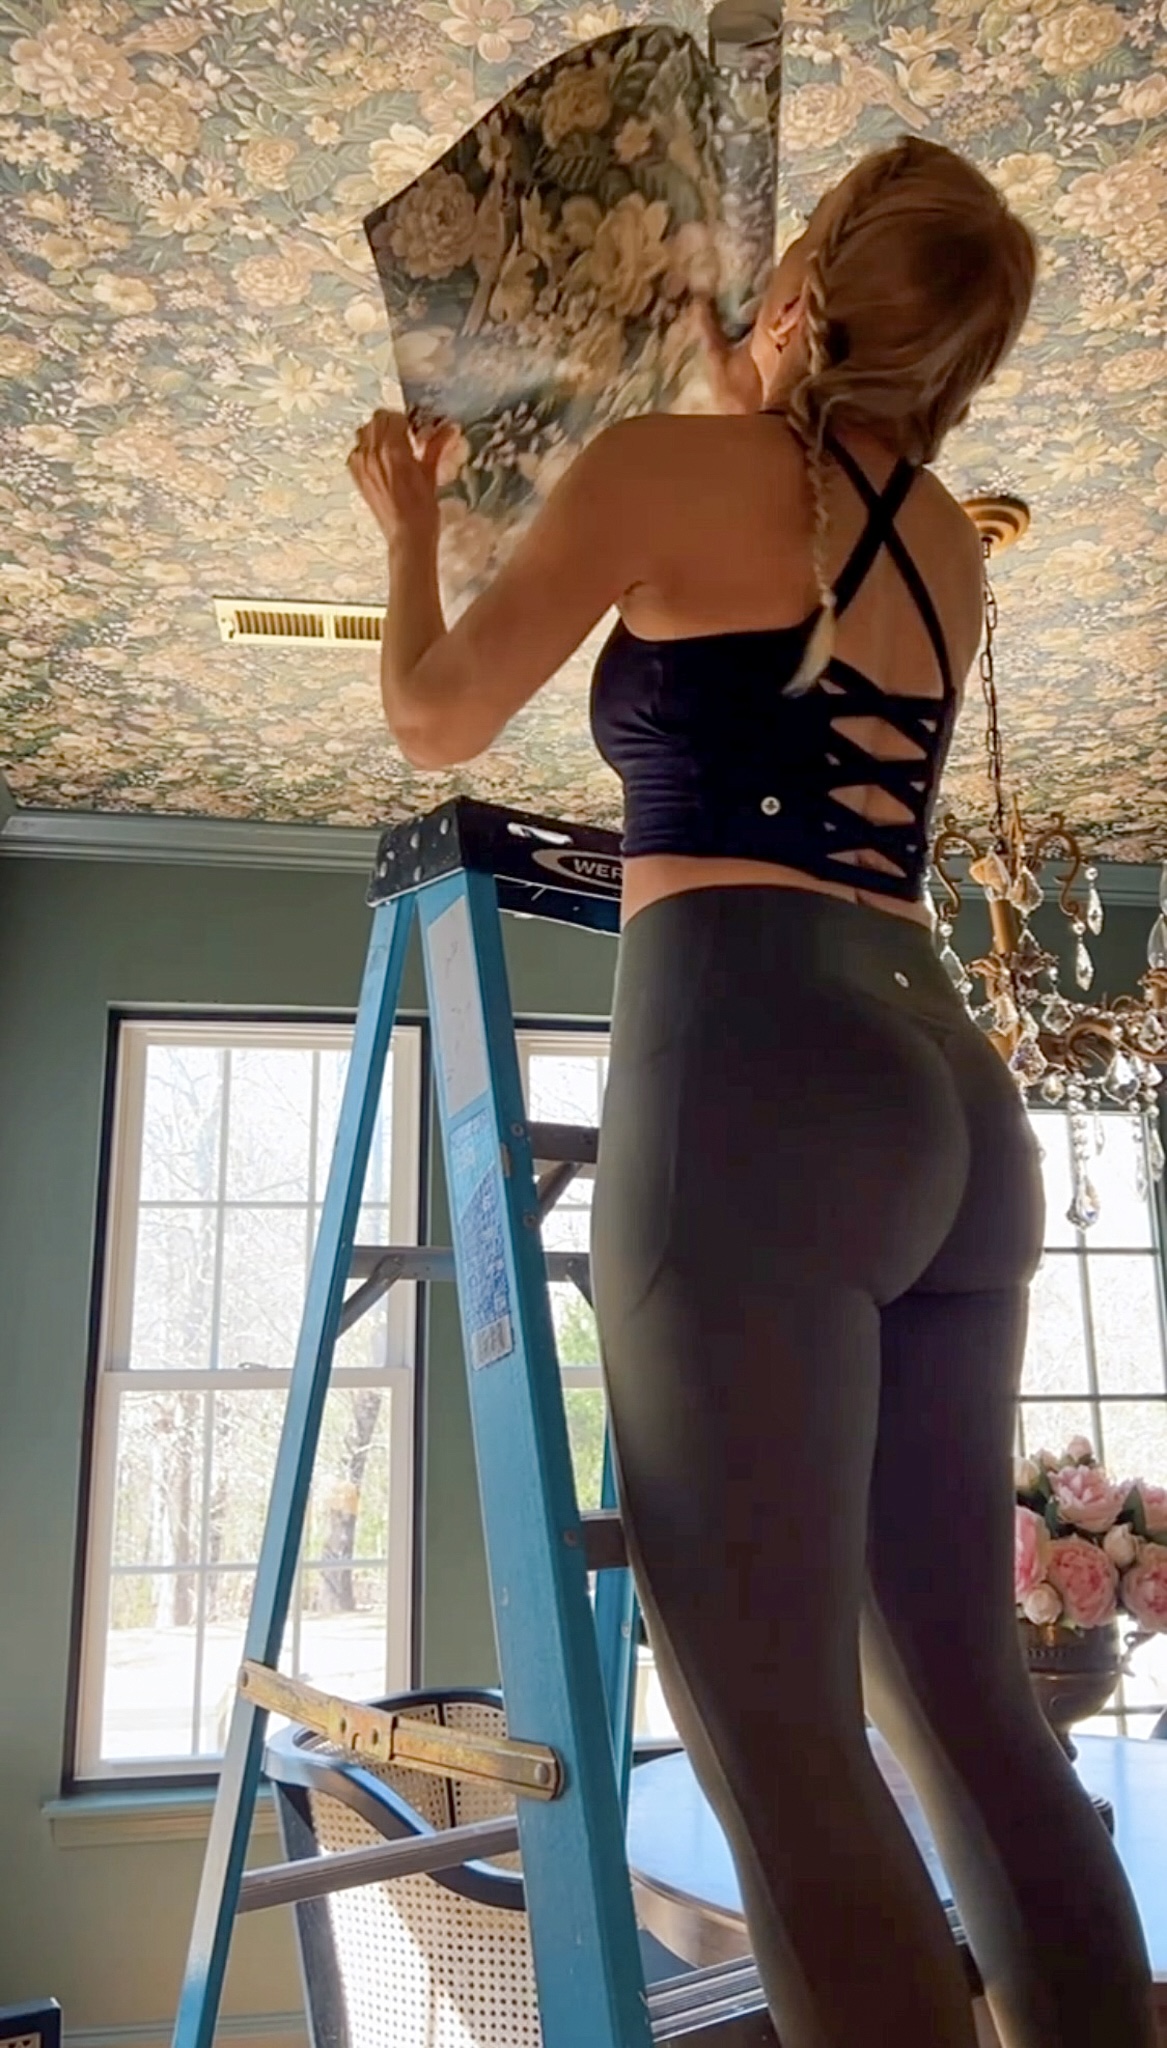
Step 3: Position & Apply the First Strip
- Start your wallpaper in the direction you want your pattern to go and along the edge of a wall.
- Peel back a few inches of the wallpaper backing and align the edge with your chalk line and the other edge with your crown molding.
- Press the wallpaper in place gently in the middle.
- Use a smoothing tool to push out any air bubbles as you work your way from one end of the room to the other.
- Carefully traverse between your two step ladders if you don’t have a helper! I balanced the wallpaper on my head and used all available limbs to manage the paper and backing.
Quick Tip: Work in small sections to prevent the wallpaper from sticking to itself or shifting out of place. Dry-fit the wallpaper to ensure the design aligns properly before fully peeling off the backing.
Step 4: Work Across the Ceiling
-
Use two ladders to walk between so you have better control when working overhead.
-
Continue peeling, sticking, and smoothing each strip, making sure to match the pattern as needed.
-
For a seamless transition between strips, overlap the edges slightly (about 1/4 inch) and trim any excess along the edges with a sharp utility knife.
-
Press down firmly where strips meet to ensure seams are tightly joined and there are no gaps.
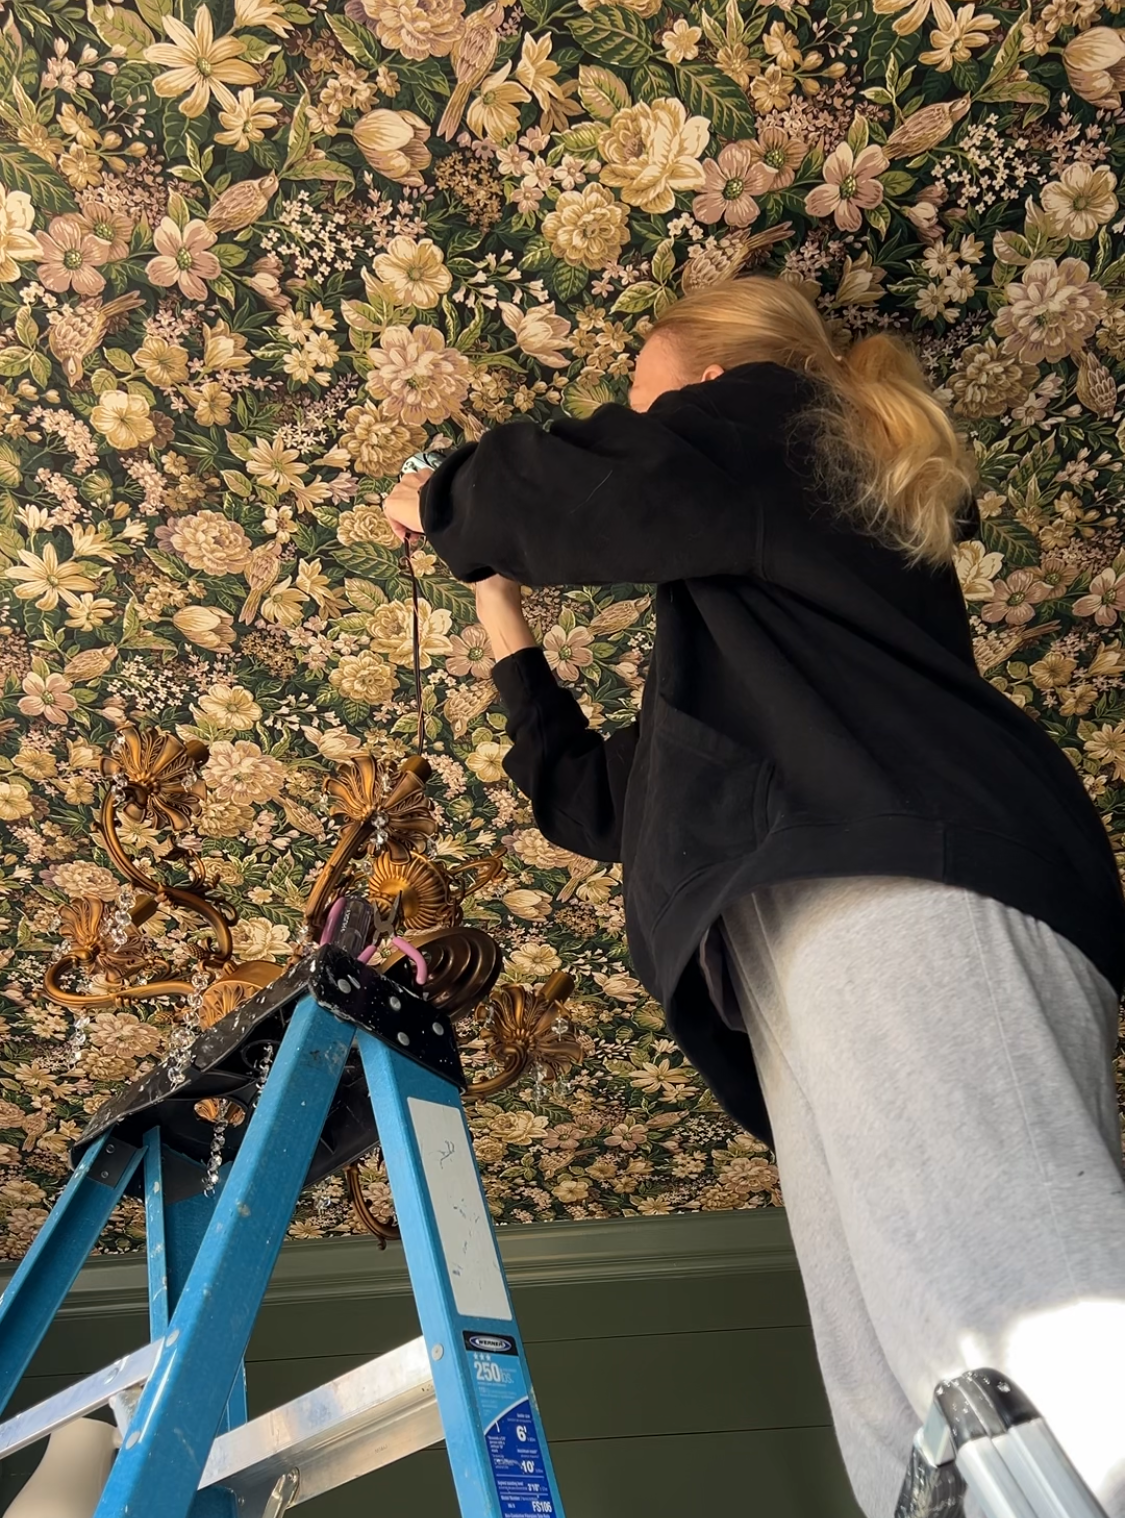
Quick Tip: If you encounter tricky spots, like light fixtures or corners, consider cutting small slits in the wallpaper for a more precise fit. A sharp utility knife works best here to make clean cuts.
Step 5: Address Air Bubbles & Imperfections
-
Check for any air bubbles and smooth them out with your tool. If you notice any stubborn bubbles, use a damp cloth to lightly press over the area, which will help release trapped air without damaging the wallpaper. I also used a pushpin to gently puncture small air bubbles and smooth out.
-
For stubborn seams, apply extra pressure with your smoothing tool and seam roller to ensure they adhere completely and look seamless.
Quick Tip: Take extra care around seams, as these are the most visible areas. A credit card or smoothing tool can help eliminate small gaps and prevent the strips from lifting over time.
Step 6: Finish the Edges & Corners
-
Trim any overhang along the edges with a sharp utility knife for a clean, polished look.
-
Use the level or spirit level again to make sure all the strips are aligned, especially near the edges and corners.
-
If needed, use painter’s tape to hold the wallpaper in place while you trim around tricky areas like light fixtures or molding.
Quick Tip: When trimming around corners or fixtures, be patient and precise. You can use a craft knife to get into tight spots and make sure everything is cut neatly.
Step 7: Let the Wallpaper Set
Once you’re done applying all the strips, allow the wallpaper to fully set and adhere to the ceiling before moving furniture or fixtures back into place. This ensures that the wallpaper stays securely in position and doesn’t require additional adhesive. If you find that your wallpaper is coming away from the wall, you may need to purchase a spray adhesive.
Frequently Asked Questions About Hanging Peel-and-Stick Wallpaper on the Ceiling
Q: Will peel-and-stick wallpaper stick to a textured ceiling?
A: It depends on the level of texture. Heavily textured ceilings may prevent the wallpaper from adhering properly. If your ceiling is slightly textured, lightly sanding or applying a smooth primer can help improve adhesion. You can also look into using a wallpaper liner to cover your lightly textured ceilings.
Q: Can I hang peel-and-stick wallpaper on a popcorn ceiling?
A: Peel-and-stick wallpaper is not recommended for heavily textured popcorn ceilings. If the texture is minimal, you may be able to sand it down or apply a lining paper first for a smoother application.
Q: How do I keep the wallpaper from falling down over time?
A: Proper surface preparation is key. Clean the ceiling thoroughly before applying the wallpaper, ensure it’s completely dry, and use a smoothing tool to remove air bubbles. If adhesion is weak, a spray adhesive or wallpaper primer can help reinforce the hold.
Q: How do I ensure the wallpaper hangs straight?
A: Use a chalk line or laser level to create a straight guideline before you begin. This ensures that your first strip is properly aligned, preventing the wallpaper from drifting as you work.
Q: What is the best way to cut around light fixtures and vents?
A: Carefully press the wallpaper against the fixture, then use a sharp utility knife to cut a precise opening. It helps to make small relief cuts in the wallpaper before final trimming to ensure a snug fit.
Q: Can I remove the wallpaper without damaging the ceiling?
A: Yes, most high-quality peel-and-stick wallpapers are designed for easy removal. To prevent damage, peel it off slowly at a 45-degree angle. If any adhesive residue remains, warm it with a hairdryer and wipe it away with a damp cloth. If you are renting, or are deeply concerned about potential damage to the ceiling, I don’t recommend trying this project.
Q: How long does it take to wallpaper a ceiling?
A: The time required depends on the ceiling size and pattern complexity. For a standard room, expect to spend 3 to 6 hours on the project, especially if working alone. Having an extra set of hands will speed up the process (and save your back!).
Q: Do I need to overlap the wallpaper strips?
A: Some wallpapers are designed for a slight overlap to prevent gaps, while others should be applied edge-to-edge. Check the manufacturer’s instructions to determine the best method for your specific wallpaper. I chose to overlap my paper because I’ve had seams shrink overtime.
Q: Can I use peel-and-stick wallpaper on the ceiling of a bathroom with a shower?
A: It depends on the ventilation and type of wallpaper. If your bathroom has good airflow and you choose a waterproof or moisture-resistant peel-and-stick wallpaper, it may hold up well. For extra protection, you could apply a thin layer of clear matte polyurethane over the wallpaper to seal the edges; however, this will make it more difficult to remove in the future.
Q: Should I run a dehumidifier before hanging wallpaper in a humid room?
A: Yes, reducing moisture levels before installation helps the wallpaper adhere better. Run a dehumidifier or air conditioner for a few hours before starting. If possible, avoid installing wallpaper immediately after a shower or cooking session in a humid kitchen.
Let me know in the comments if you have any other questions and I’ll do my best to answer! Good luck!